A few weeks ago I decided I needed a reminder that God has everything under control and that I need to feel more peace about the direction my life is headed in. I saw a painting that said “It is Well With My Soul” and wanted to make something similar. The problem I often run into is that I get such a clear idea in my head for how I want something to turn out, that I can’t find anything that fits the bill. So after visiting two craft stores and two hardware stores and still not finding the perfect stencil-stickers for this project… I decided to make them.
I do not recommend this. Go out and find the stencils that you want or order them online. But if, like me, you absolutely must have exactly what you want, exactly when you want it…. Here is how I did it.
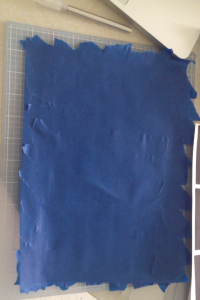
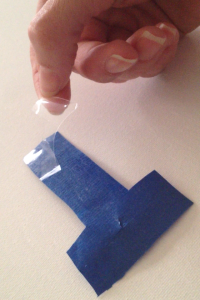
Step 1: I lined a plastic sheet protector with blue painters tape, first horizontally and then vertically. Now I had a roughly 9 x 12 sheet that would be sticky on one side and paint-ready on the other.
Step 2: I chose the exact font I wanted. Part of the problem was that I wanted the letters to be exactly 3.5 inches tall, and all of the stores I checked had only 3 inch letters. This whole process began because I was unwilling to compromise on this lettering- so it had to be perfect.
(Like I said earlier, my advice: Go online. Find the sticker lettering you are looking for. Order it. Be Patient. Wait for them to deliver it to you.)
Or: Print it yourself and place it over your blue tape.
Step 3: Using a razor, cut out each letter. Make sure you cut deep enough to go through both layers of painters tape and the plastic behind it.
Step 4: Peel the plastic coating off the back of your letter. Now you have sticker lettering made with painters tape.
Step 5: Position your lettering on the canvas. It might help to do the positioning before you peel all of the plastic backing off of your letters to make sure that everything lines up exactly the way you want it to.
After you have all of your lettering on the canvas, just paint over it with the color of your choosing. When you peel off the lettering you will still have the stark white of the canvas. I did so many coats trying to get the sandy color just right (go figure) that I ended up with less-than-perfect edges, so I just went back over the lettering with white paint.
Finished Product:
Sometimes I look back at the the things I have done and just want to flick myself in the head for spending so much time doing it all the long way, just so that it is exactly how I want it, exactly when I want it. (This sentiment applies to a lot of my “real-life” experiences as well as many of my convoluted DIY methods!)
Here’s a perfect example of what I mean: Last Christmas I made darling little Florida Ornaments for my tree. Half-way through the project, I decided I wanted the little 1/4″ gifts to be wrapped in blue, not red and gold, so I re-wrapped them in sparkly ribbon. They turned out adorable… but I look back at the hours I spent doing that and just roll my eyes.
Luckily, now- even when I want to flick myself in the head for life choices or time wasted- I have a reminder that it is all turning out as it should… and it is well with my soul.


